
Storage Drives
Storage Drive Groups
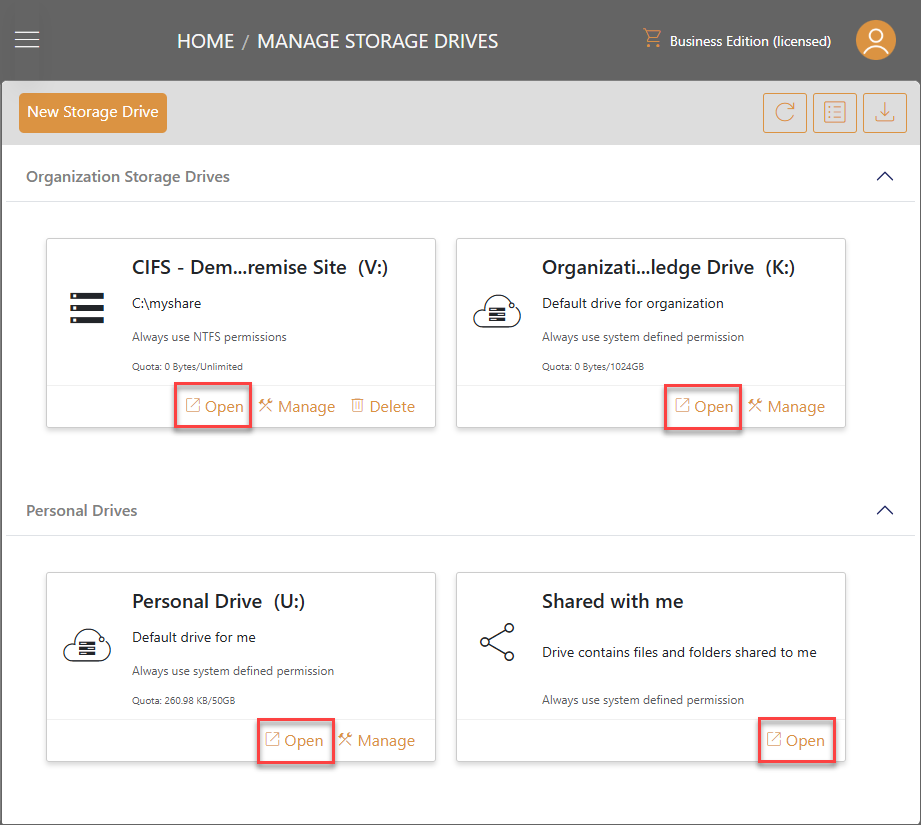
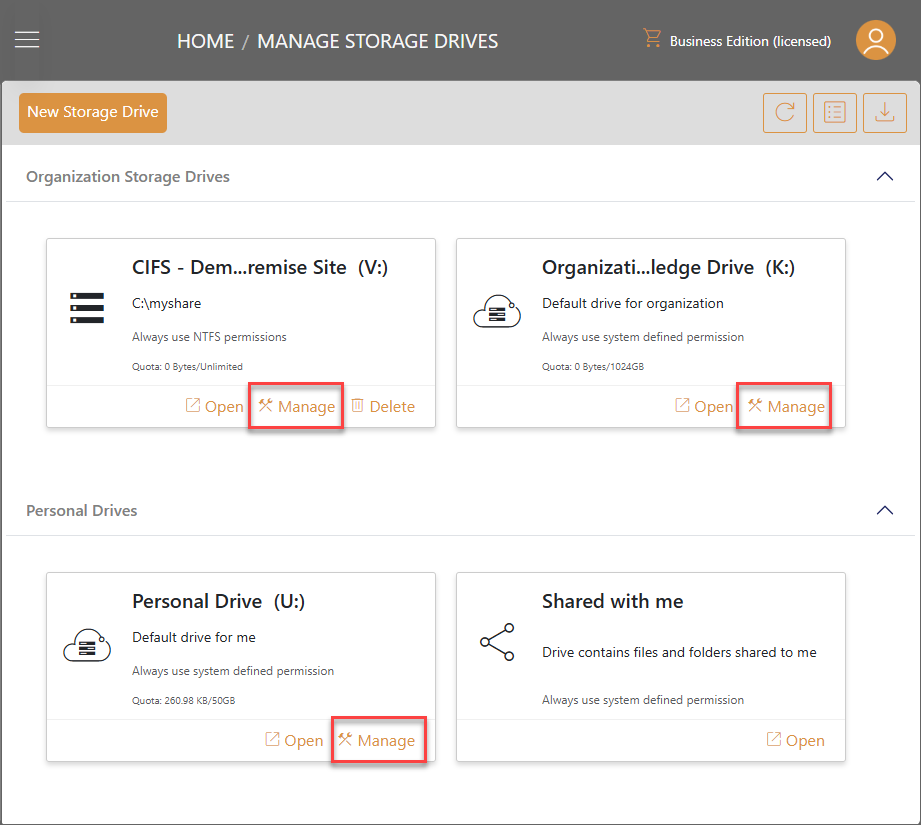
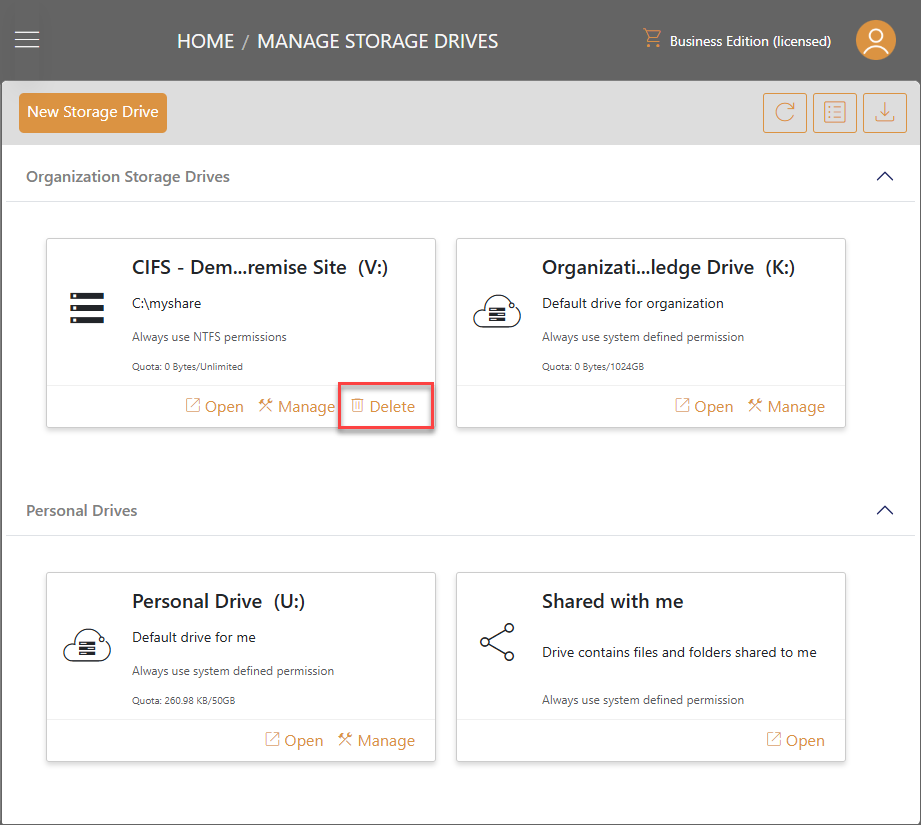
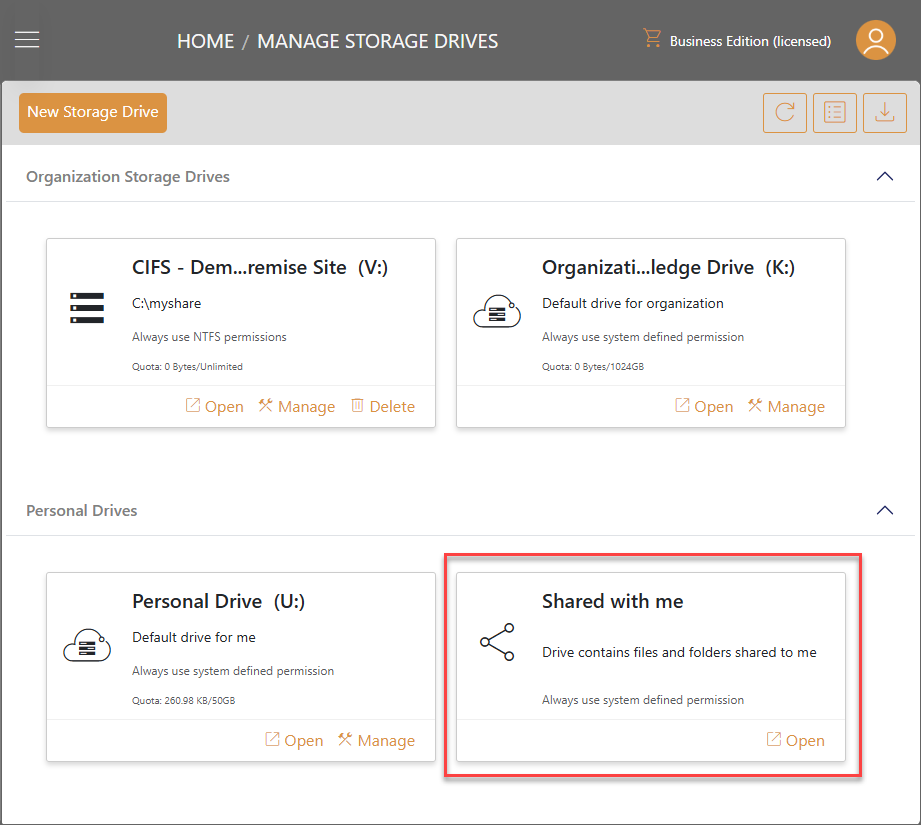
There are 2 groups of storage drives, Organization Storage Drives and Personal Drives.
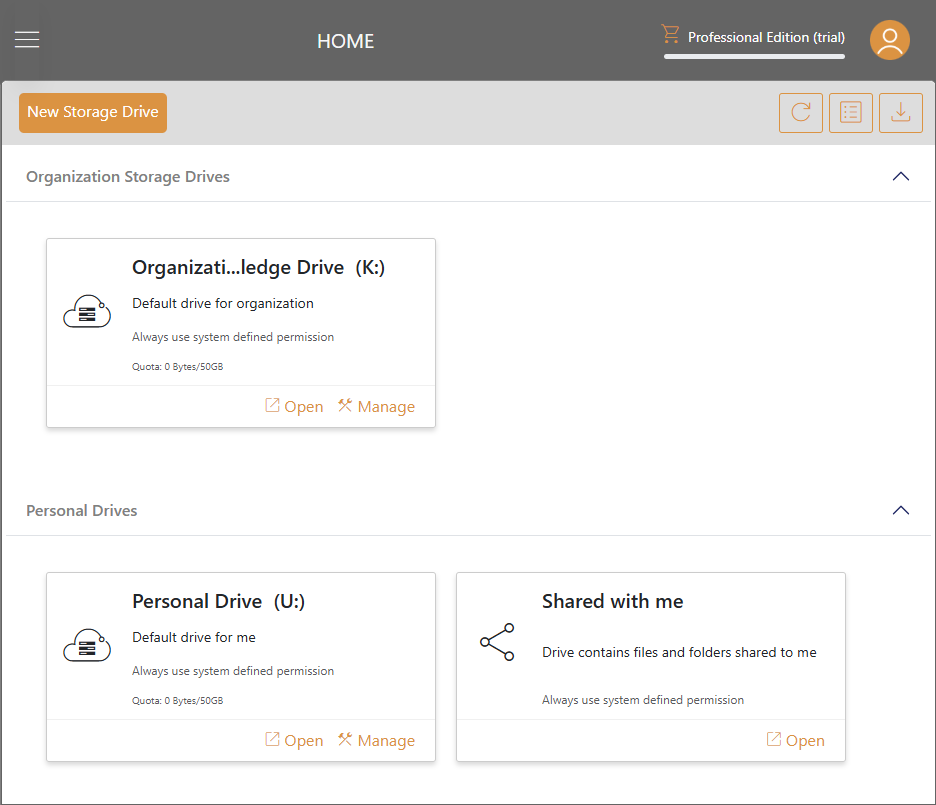
Organization Storage Drives
This is the default drive for organization.
Personal Drives
In this group, you will see your personal drive and the drives that contains items shared with you.
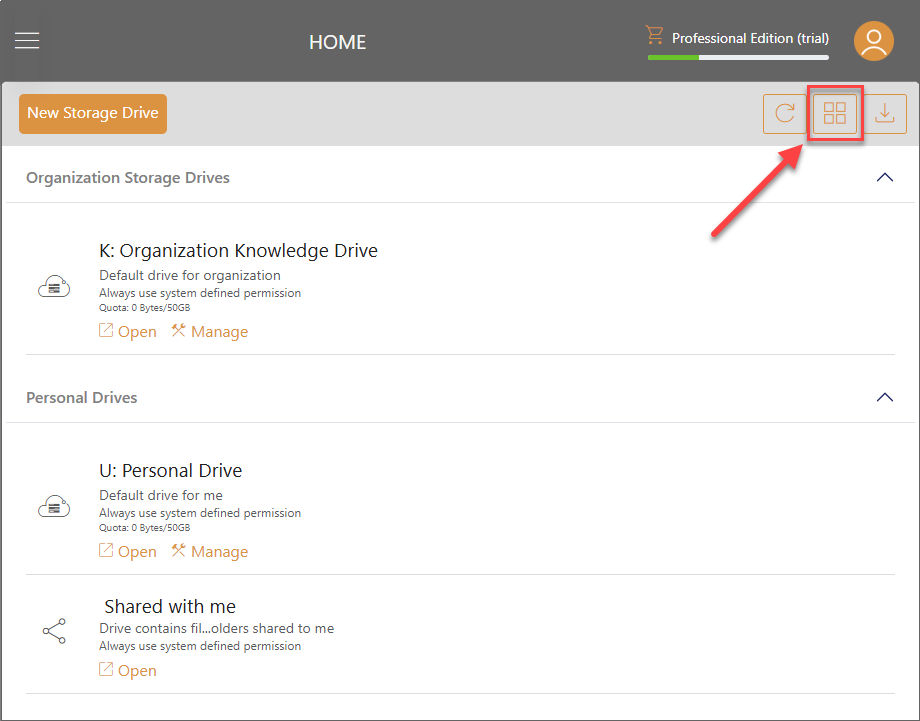
Switch between Icon View and List View
You can click switch icon to toggle between Icon View and List View.
Icon View
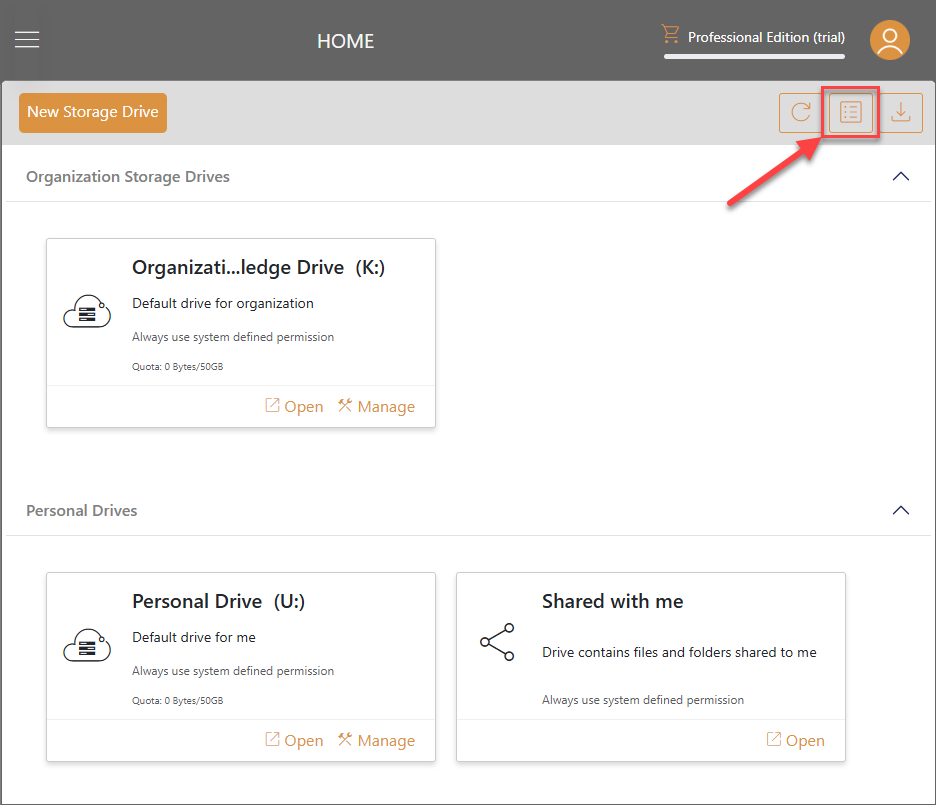
List View
Refresh
Click Refresh icon to reload your storage drives view.
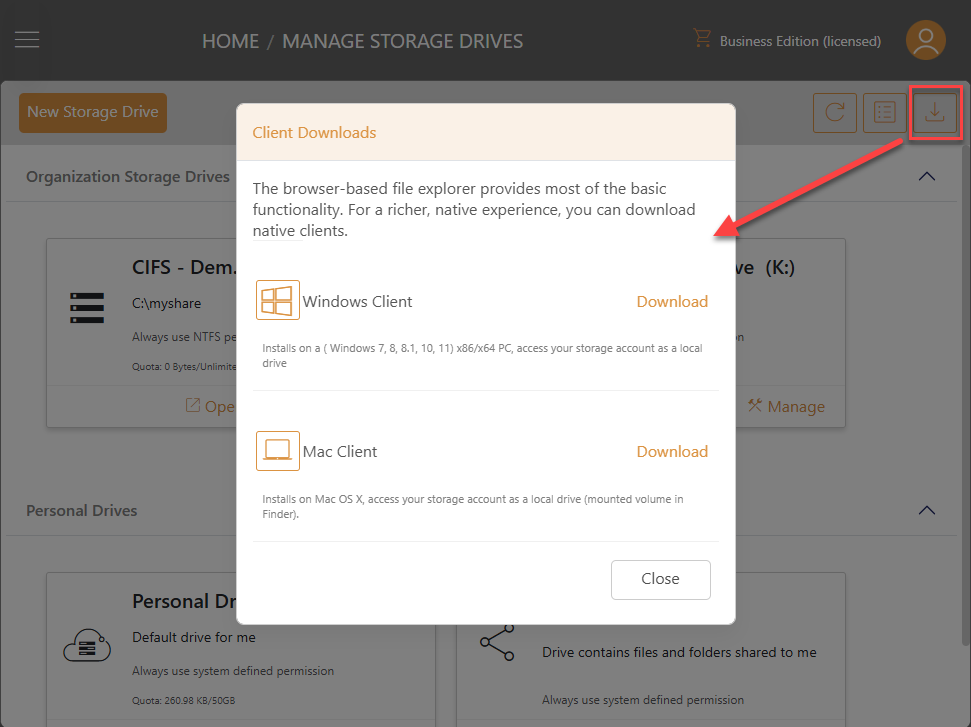
Download Clients
Click on the Download icon at top right to open Client Downloads window. From here, you can start to download and install Windows Client or Mac Client.
Open Storage Drive
Click on Open or click on the card directly to view the files and folders in this drive.
The actions you can do for this drive:
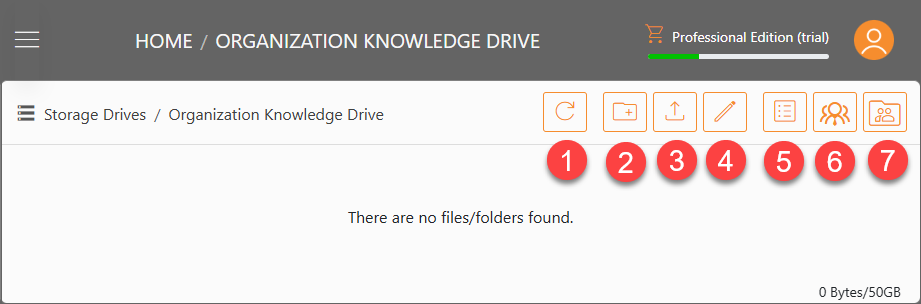
1. Refresh
Click Refresh (1) icon to reload your drive.
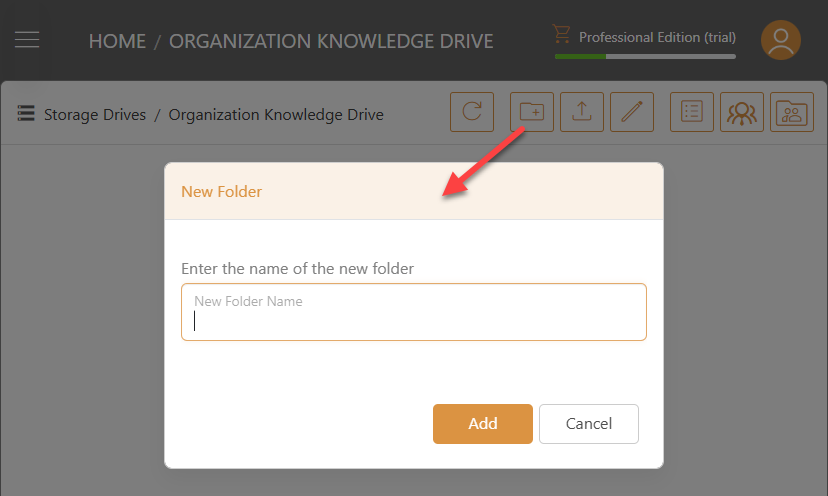
2. New Folder
Click New Folder (2) icon to add a new folder. Enter a name for the new folder, and select Add.
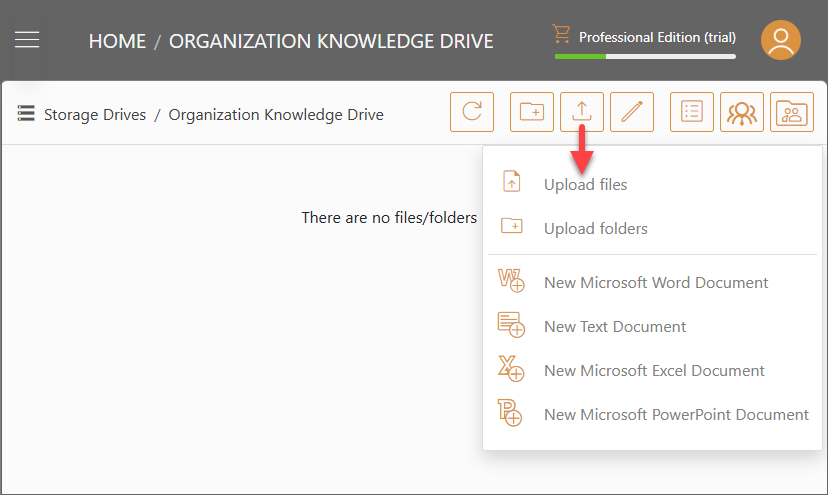
3. Upload
Click Upload (3) icon to upload files or folders. You can also add a new Microsoft Word / Excel / PowerPoint document or a Text document from here.
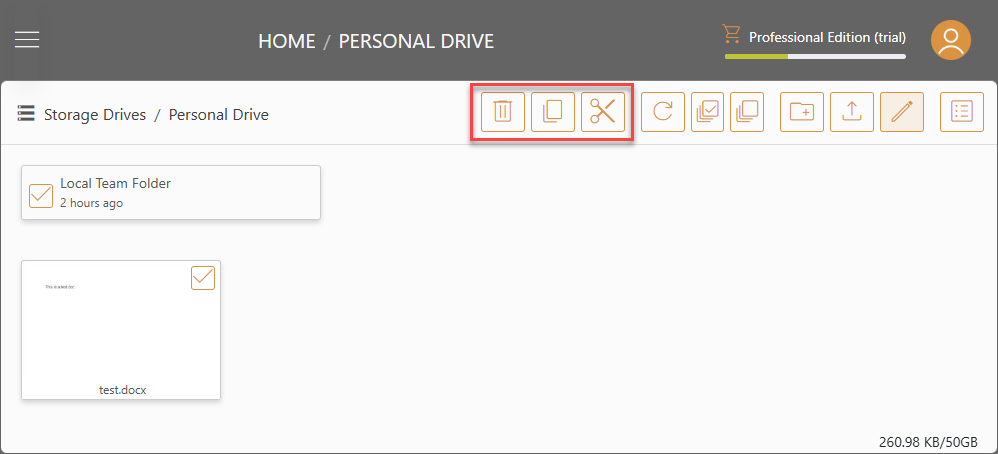
4. Edit
After clicking on the Edit (4) icon, two new icons appear. One is Select All, and the other is Select None. If you choose Select All or check mark any of the files or folders, another set of icons will show up. You can choose to Delete, Copy, or Cut action to the selected files and folders.
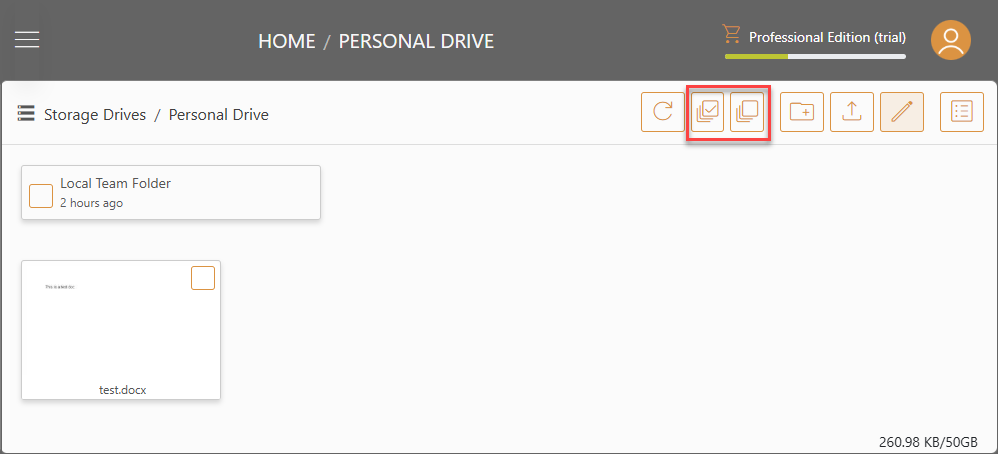
5. Icon View and List View switch
Click on the Icon View and List View switch (5) to toggle between different views.
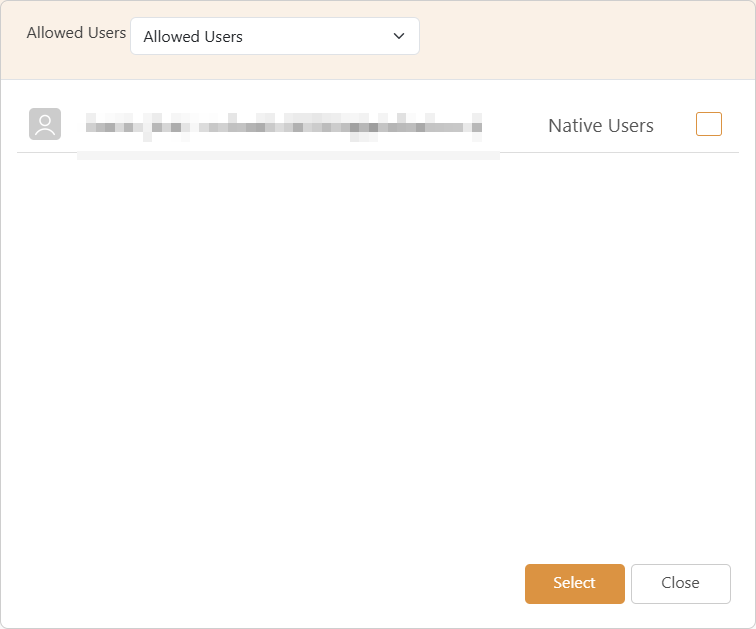
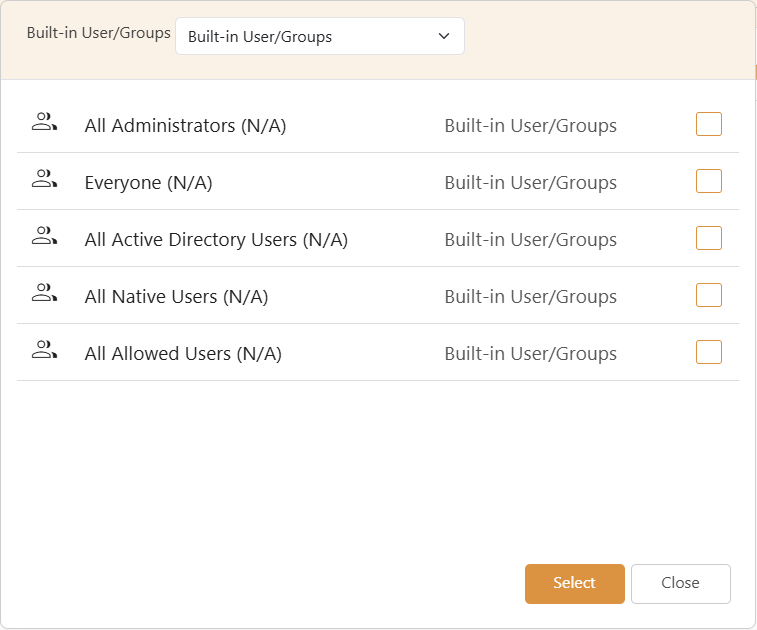
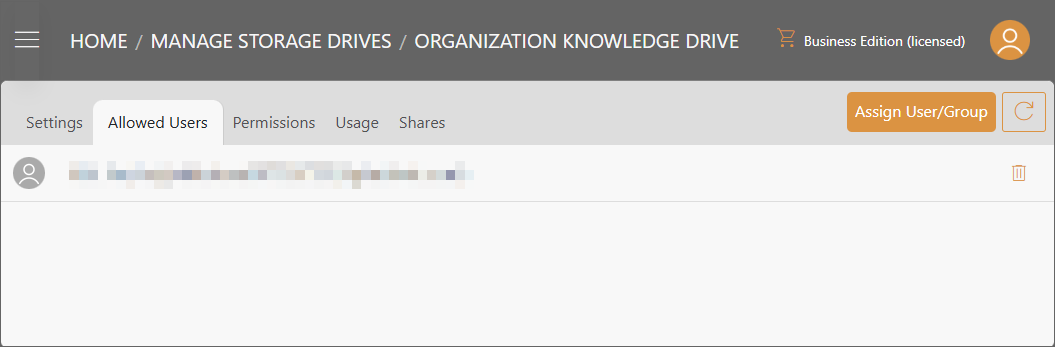
6. Users Allowed to Access the Drive
You can check who has the permission to access the drive by clicking on the Users Allowed to Access the Drive (6) icon.
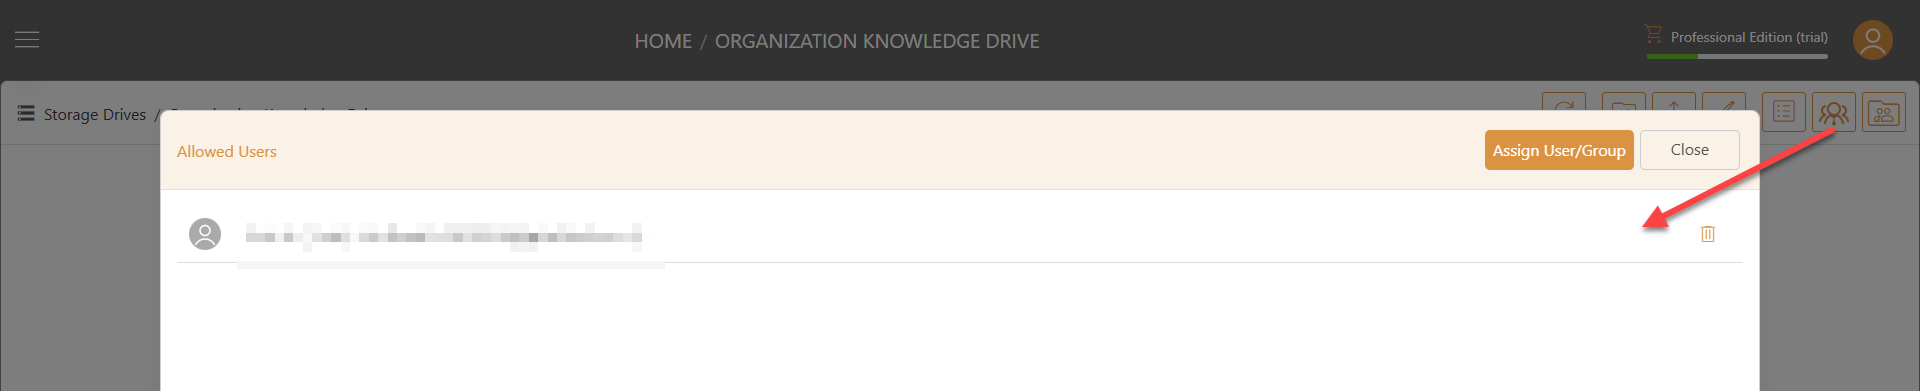
To grant the users to access the drive, you can click on Assign User/Group button.
7. Folder Permissions
Click on Folder Permissions icon to set up the permissions to the folder. See more information about Permissions.
Manage Storage Drive
Click on Manage to set up the drive Settings, Permissions, View the Usage and other controls.
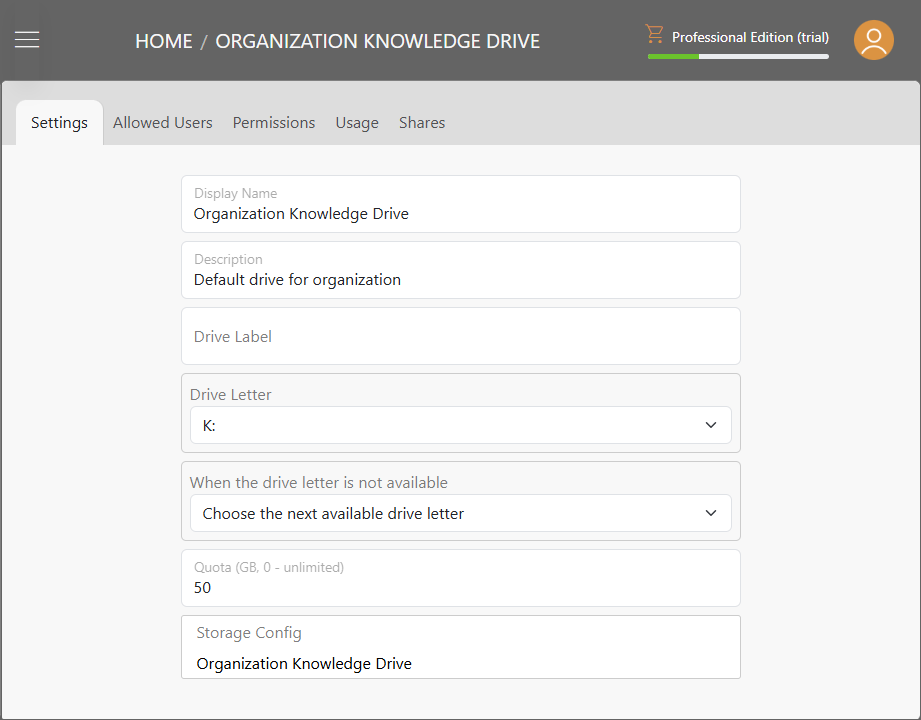
Settings
Configure the settings of the drive.
Allowed Users
Manage what users are allowed to access the drive.
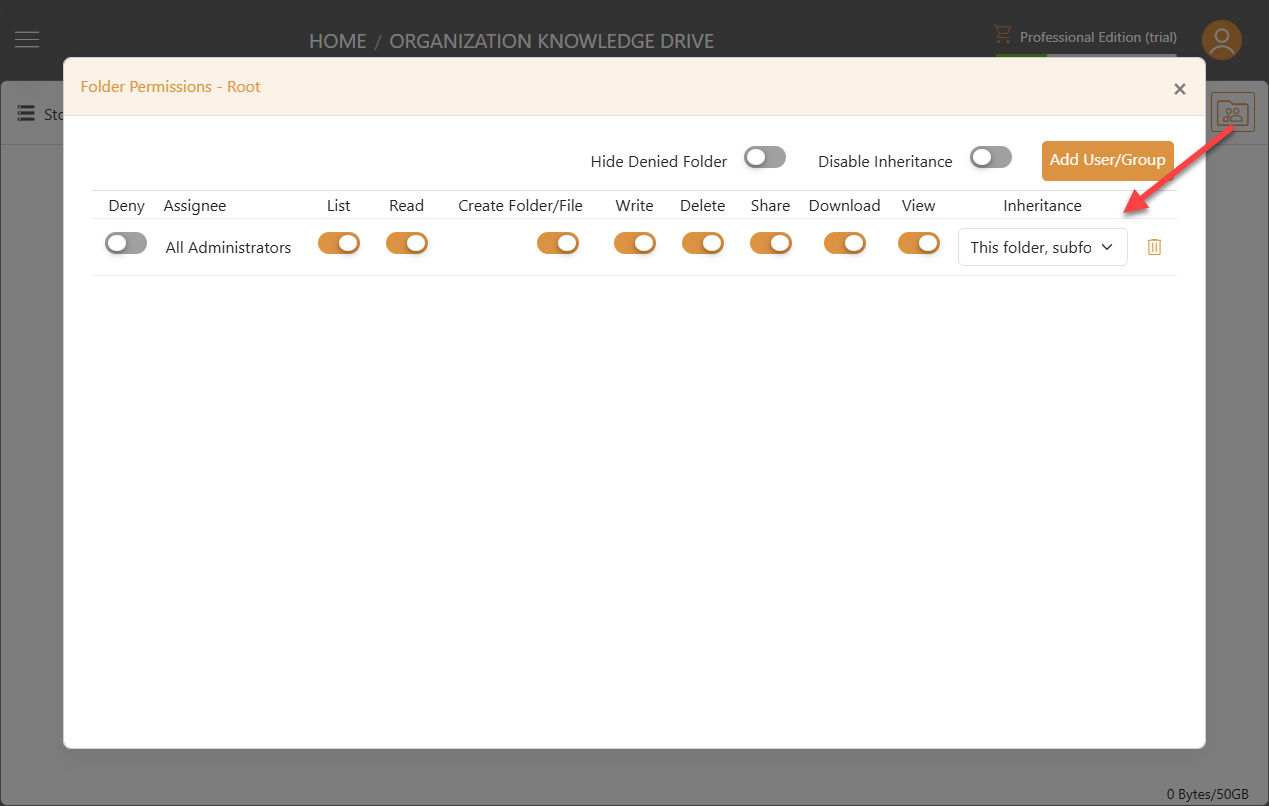
Permissions
Manage the permissions of this drive and its subfolders. You can control access by toggling specific permissions on or off.
To manage the permissions of a specific subfolder, use the drop-down menu to navigate the folder structure and select the desired subfolder. Toggle Disable Inheritance on the top toolbar to begin modifying subfolder permissions, or select Add User/Group to add new permissions without altering inherited ones.
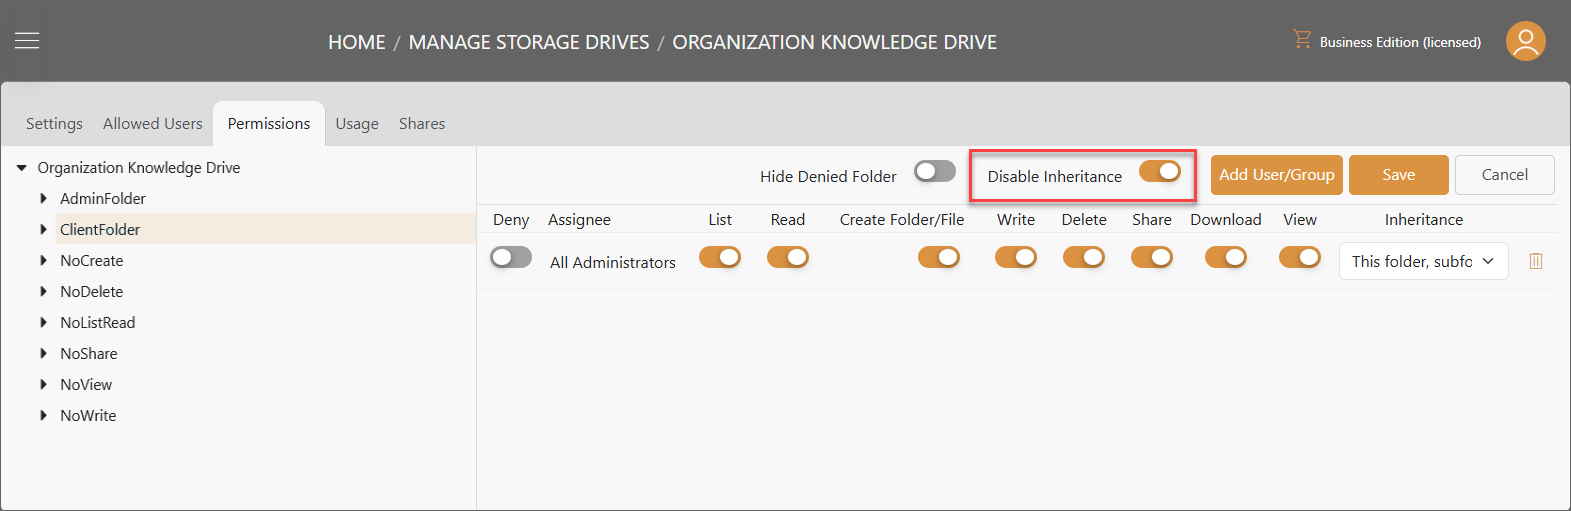
There are several configuration options available, including toggles for permissions, inheritance selection via drop-down, and a delete option.
Deny
Toggling this on will deny access to the drive or folder, regardless of any other enabled permissions.
Assignee
Indicates the user or group to whom the permission applies.
List
Toggling this on allows the user to browse and view the folder/file structure. Turning it off will block access to view the contents of the drive or subfolder.
Read
Allows the user to access the More Info tab, which displays the information on file size, changes, versions and shares.
Create Folder/File
Enables the user to create folders and files (e.g., .docx, .txt, .xlsx, .pptx) directly in the web portal, and to upload files or folders.
Write
Grants the ability to edit files. Note that Read and View permissions may also be required.
Delete
Allows the user to delete files and folders.
Share
Permits sharing of files and folders. The level of access granted in a share is limited to the permissions the user already has. For example, a user without Download permission cannot share a file with download capability.
Download
Grants the ability to download files. Note that Read permission is also required.
View
Allows the user to view files using OnlyOffice or the default document viewer.
Inheritance
Inheritance determines how permissions apply to subfolders and files within the current folder.
- This folder, subfolders, files: Permissions apply to the folder, all subfolders, and all files within.
- This folder and subfolders: Permissions apply to the folder and its subfolders, but not to files directly inside the root folder.
- This folder and files: Permissions apply to the folder and its files, but not to subfolders or their contents.
- Subfolders and files only: Permissions apply to subfolders and their files, but not to the folder itself.
- Subfolders only: Permissions apply to subfolders and everything within them, but not to the folder itself or its direct files.
- Files only: Permissions apply only to files directly inside the folder.
- This folder only: Permissions apply solely to the folder and not to any subfolders or files.
- Inherited: Indicates that the permission is inherited from a parent folder and cannot be modified directly.
Delete
Click on the Delete icon on the right side to delete permission settings for a user or group.
Hide Denied Folder
Toggling on Hide Denied Folder will hide any folders the user does not have access to when viewing the drive. For example, if this setting is enabled, the user will not see folders where Deny is turned on or List is turned off.
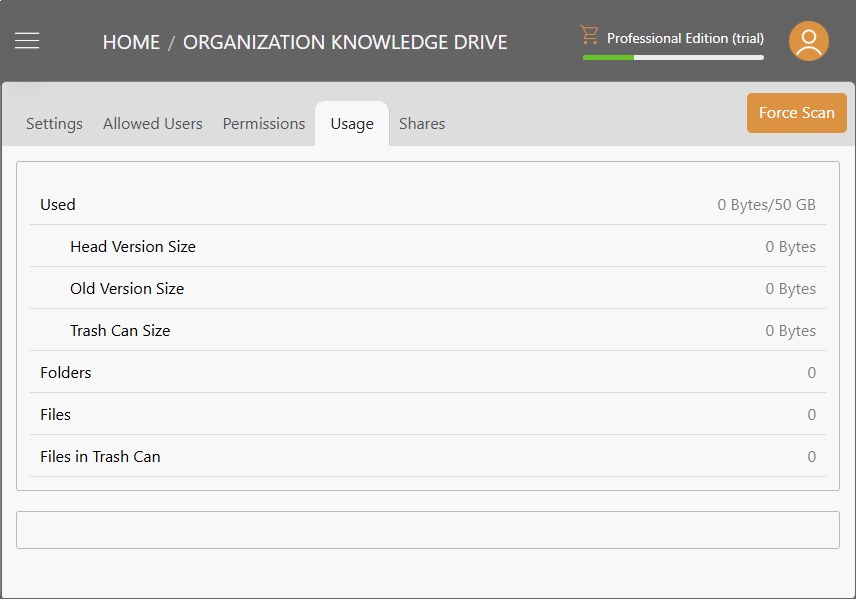
Usage
View statistics of files stored in the drive.
Shares
Manage ongoing shares within the drive.
Delete Storage Drive
Click on Delete to delete the storage drive.
New Storage Drive
Click New Storage Drive button at the top to see the storage drive types available to choose.
On-premise CIFS Share
Connect a site to mount remote CIFS share
S3
Amazon Simple Storage Service
Azure
Azure Blob Storage
Azure Files
Connect Azure Files Share
Wasabi
Wasabi Storage
SharePoint Online
Microsoft SharePoint Online
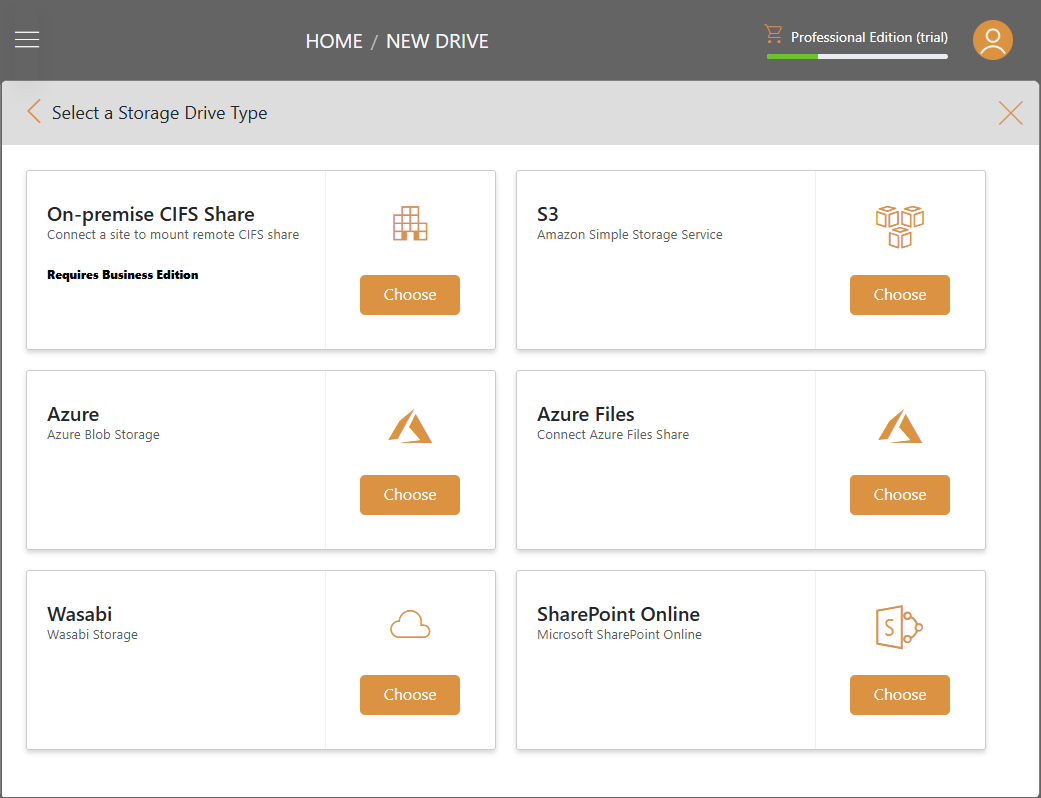
Choose the desired storage drive type to continue.
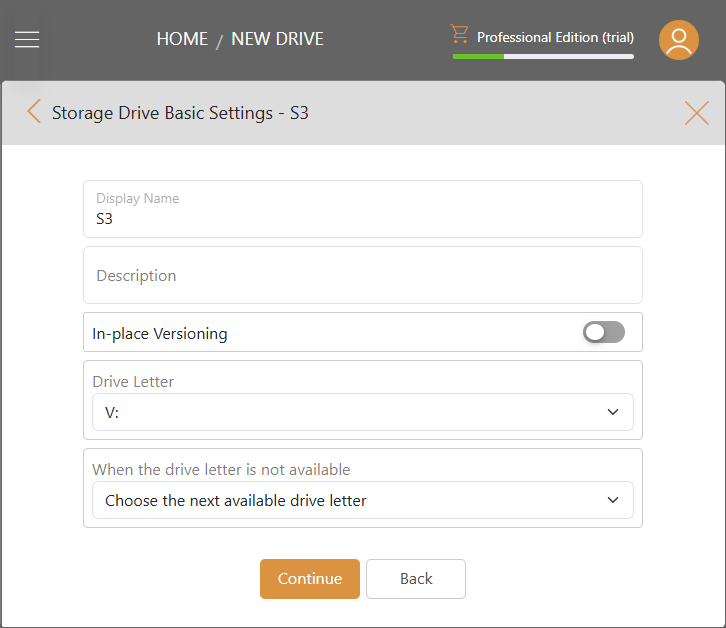
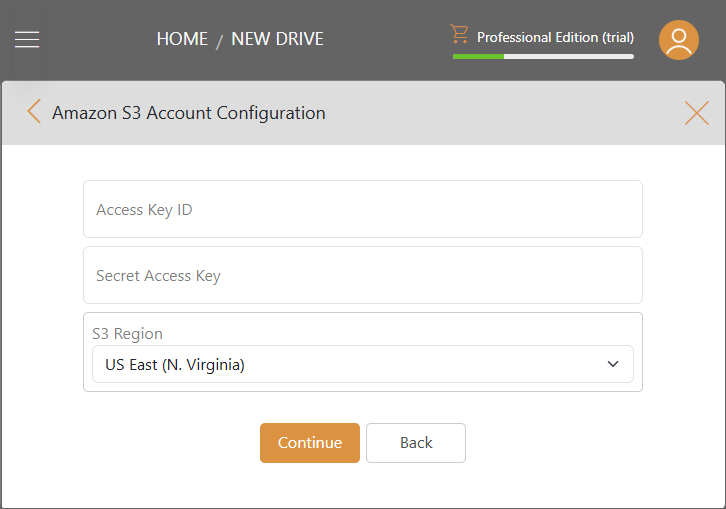
Enter access key or code then click Continue to finish adding new storage drive.
Public Link
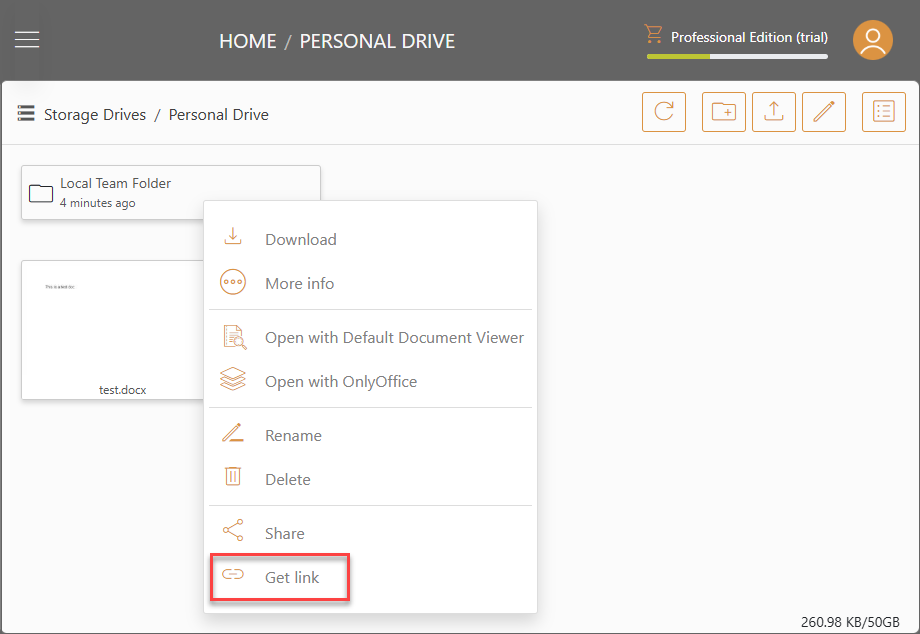
Creating Public Link
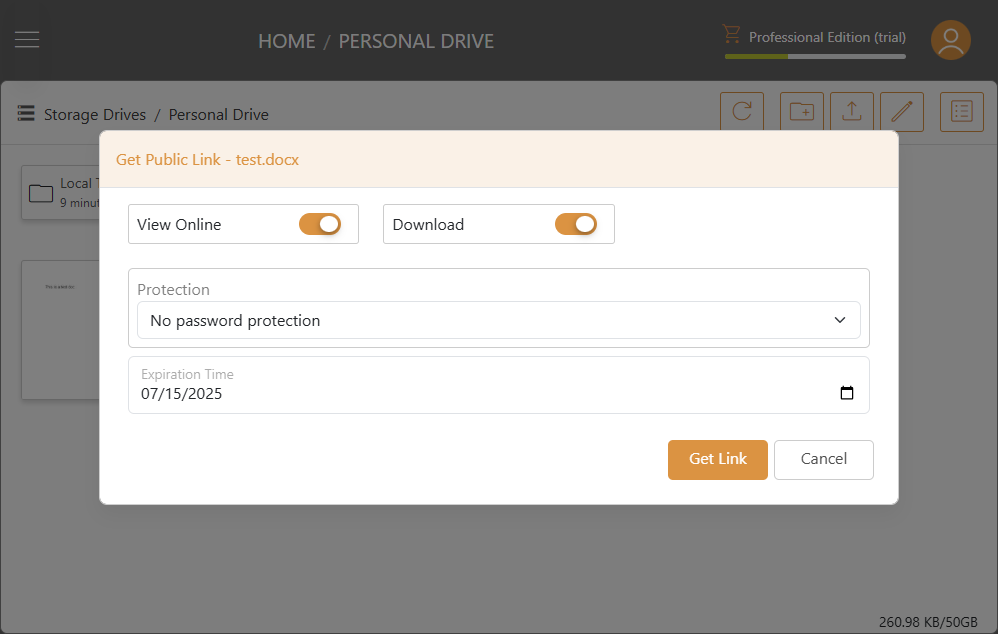
Open the storage drive, and right click on a file/folder, then select Get link.
On the Get Public Link window, configure the public link share as needed, and then select Get Link:
Permissions:
- View Online: When enabled, the shared file(s) can be viewed online without being downloaded. When disabled, the shared file(s) can only be viewed by being downloaded.
- Download: When enabled, the shared file(s) can be downloaded. When disabled, the shared file(s) cannot be downloaded.
Protection:
- No password protection
- Password Protection: If password protection selected, A password field will show up. You can set up a password. Then the password will be required to access the public link.
Expiration Time:
Set the time for when the public link expires.

Managing Public Link
To manage all public link for a particular drive, log in to the web portal as an admin and click Manage under the drive.
Then, select the Shares tab. All public links will be displayed here with public link in the Shared To field.
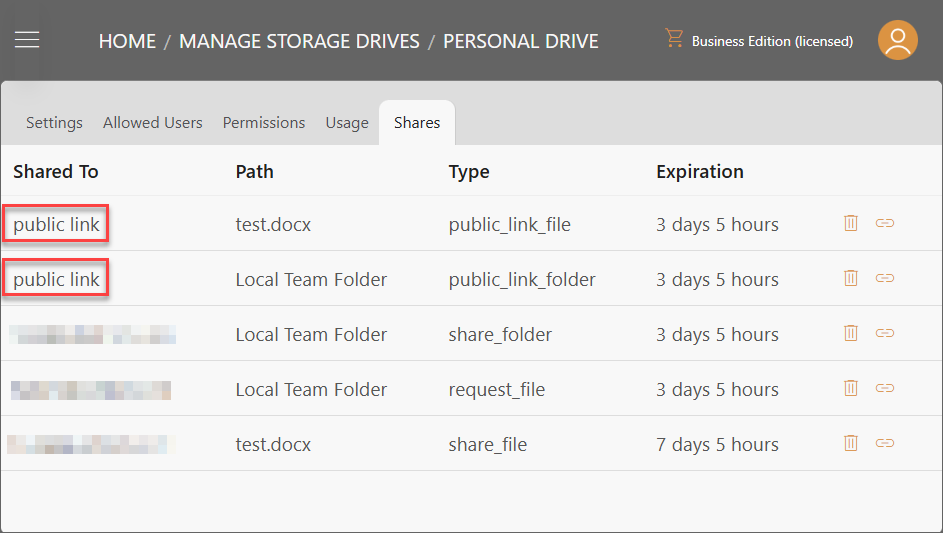
To view the link corresponding to each public link, click on the Get Link icon on the right.
To delete a public link, click on the Delete icon on the right.
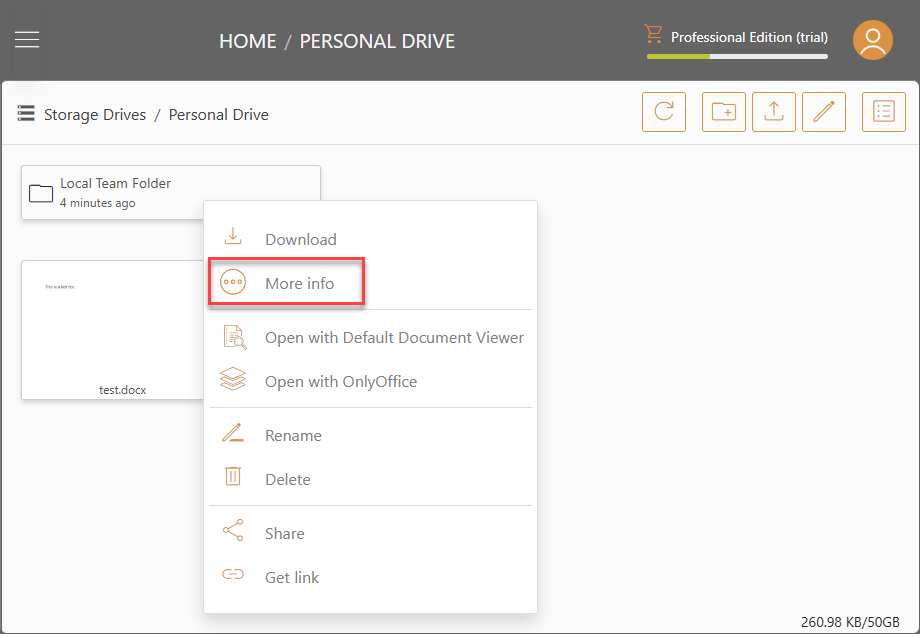
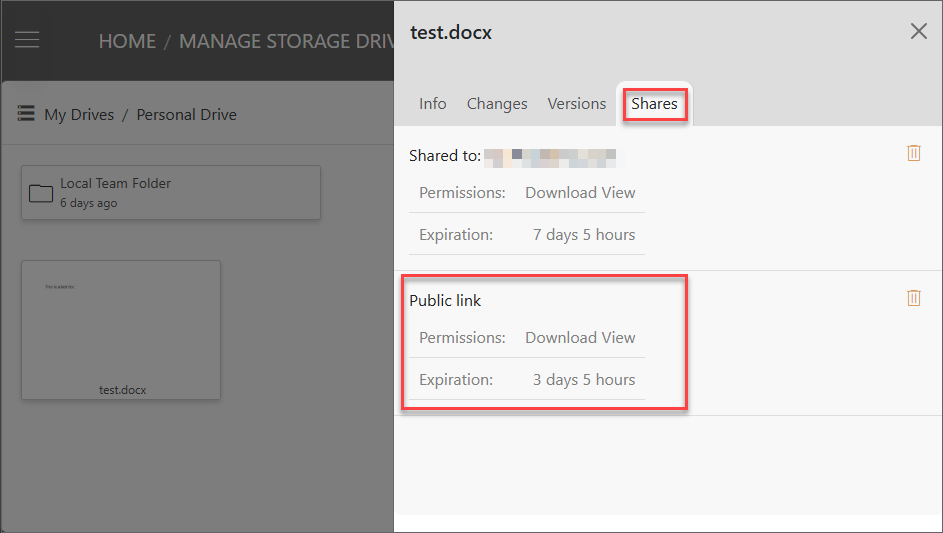
To access all public link for a particular file or folder, right click on that file or folder, click More Info, and then navigate to the Shares tab. From here, you can see details about public links. You can delete public link by clicking on the trash can icon to the right.
Share
Sharing a File/Folder
To begin sharing a file/folder, right click on the file/folder you want to share and select the Share option.
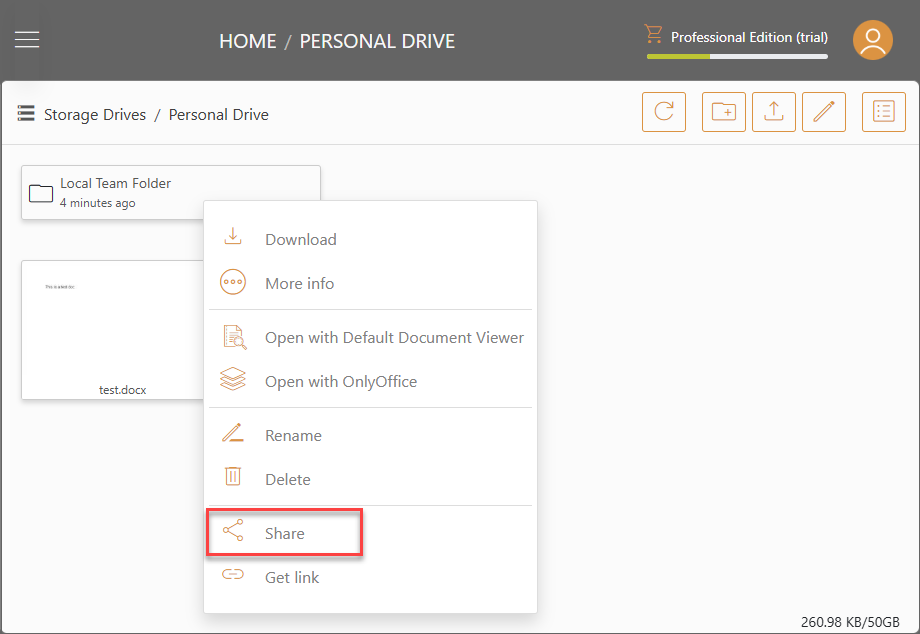
This will open a window for you to set up sharing conditions.
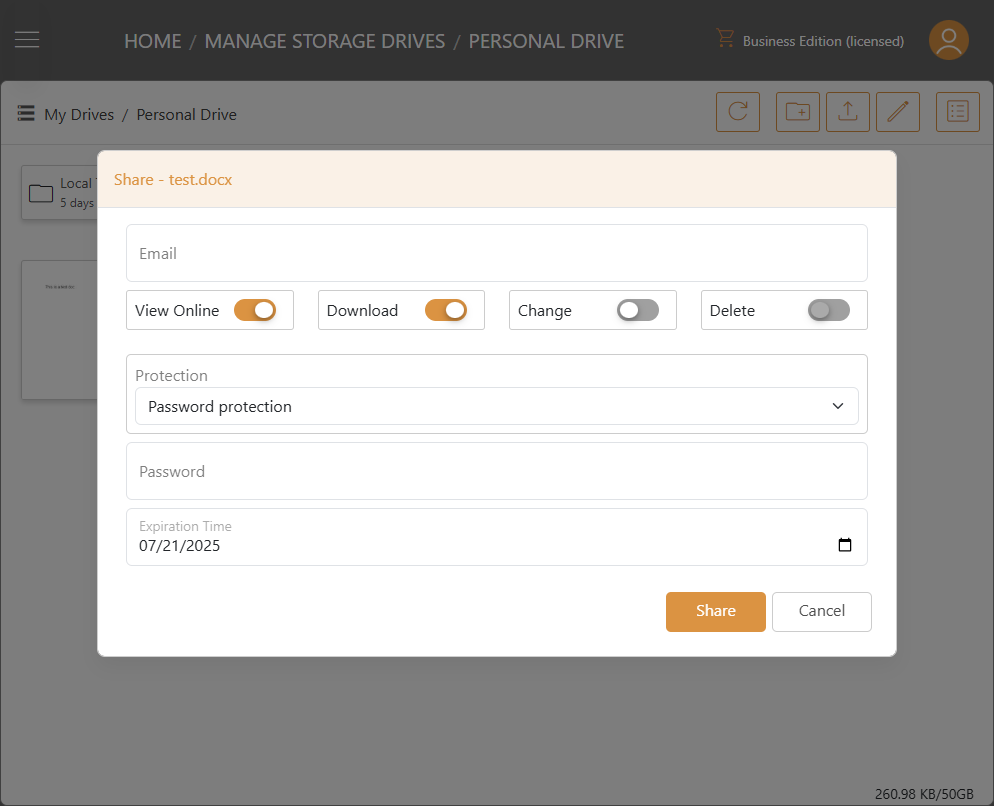
Email:
Enter the email you want to share the file/folder to. This could be any internal or external email address.
Permissions:
- View Online: When enabled, the shared file/folder can be viewed online without being downloaded. When disabled, the shared file/folder can only be viewed by being downloaded.
- Download: When enabled, the shared file/folder can be downloaded. When disabled, the shared file/folder cannot be downloaded.
- Change: Toggling this on enables the user to edit the file/folder if it is shared to a user registered with the organization.
- Delete: Toggling this on enables the user to delete file/folder and sub folders in the shared folder.
Protection:
- No password protection
- Password Protection: If password protection selected, A password field will show up. You can set up a password. Then the password will be required to open the share link sent to user email.
Expiration Time:
Set the time for when the share expires and the user will lose access to the shared file/folder.
Managing Files/Folders Shares
To manage the files/folders shares, log in to the web portal as an admin and click Manage under the drive.
Then, select the Shares tab. All shares, identified as their type share_file and share_folder, are displayed
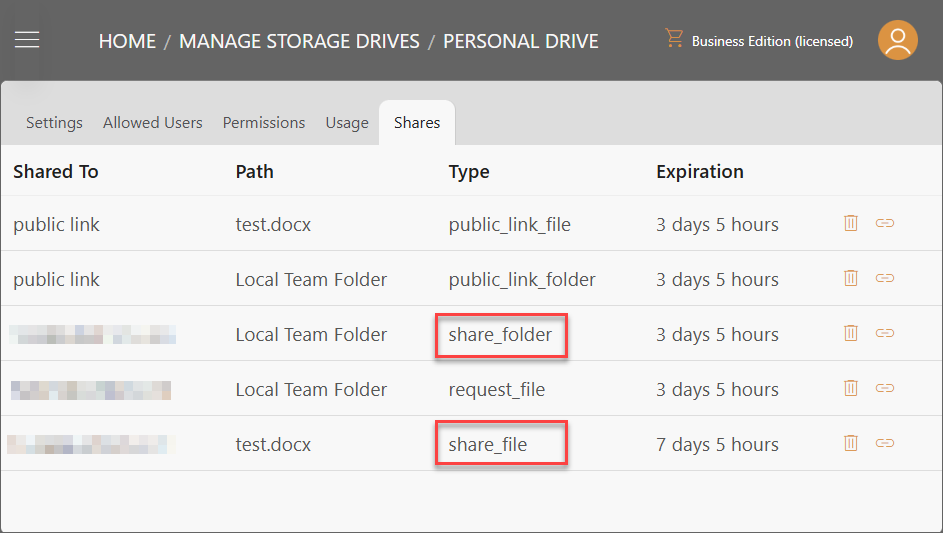
To view the link created for each share, click on the Get Link button on the right.
To delete an on-going share, click on the Delete icon on the right.
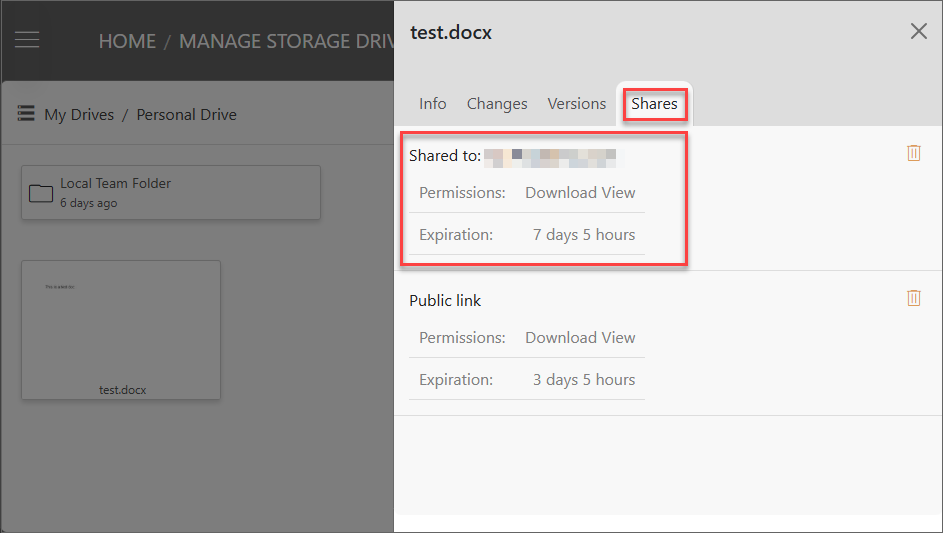
To access all shares for a particular file or folder, right click on that file or folder, click More Info and then navigate to the Shares tab. From here, you can see details about shares. You can delete shares by clicking on the trash can button to the right.
Accessing Share
After a file/folder is shared to an email, that address will receive an email containing links that would provide access to the shared file/folder without the need to log in or create a Triofox.ai account. If the file/folder is shared to a registered user in Triofox.ai, they can also view the shared file/folder in their Shared with me drive.
Request Files
To begin request files, right click on the folder you want to store the files and select the Request files option. Allows you to pass a folder link to a user and request the user to upload a file to this folder.
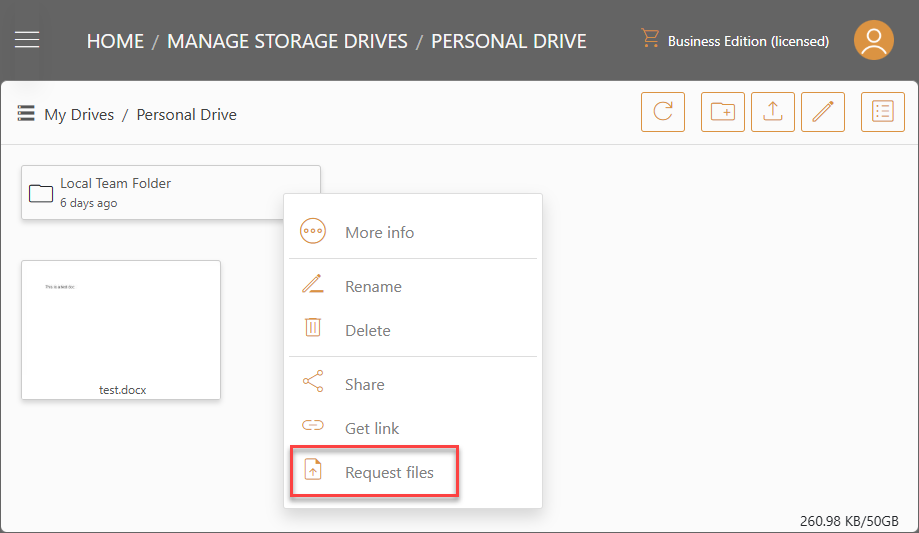
This will open a window for you to set up folder link conditions.
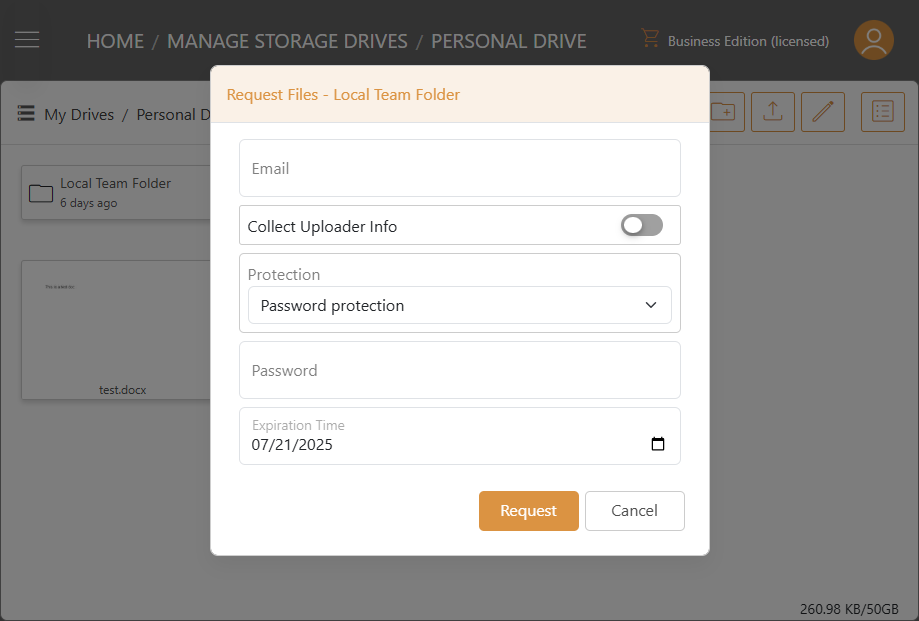
Email:
Enter the email you want to request the files to. This could be any internal or external email address.
**Collect Uploader Info
This setting lets you to set up if you want to collect the information from the user who uploaded the requested files.
Protection:
- No password protection
- Password Protection: If password protection selected, A password field will show up. You can set up a password. Then the password will be required to open the request files link sent to user email.
Expiration Time:
Set the time for when the request files expire and the user will lose access to the request files.
After configure your folder link settings, click Request. The folder link will be generated. The Triofox.ai File Upload Invitation email will be sent to the recipient.